")

When building a shed, the foundation is key, and a concrete foundation, specifically a concrete slab, is the best choice. A well-built concrete slab offers unmatched stability and durability, keeping your shed level and secure for decades, and minimising risks like sinking or shifting.
One major benefit of a concrete slab is its load-bearing capacity. Whether you’re storing heavy equipment, parking small vehicles, or setting up a workbench, a concrete floor can handle it all. It’s also resistant to wind forces, which is crucial in areas prone to severe weather.
Using a concrete slab ensures compliance with warranty and local building codes, adding value to your property. The durability of concrete eliminates concerns over damage from heavy items, making it ideal for a workshop or storage space. By choosing a concrete slab, you’re investing in the longevity and functionality of your shed.
Here’s what we’ll cover in this blog:
-
- Why You Need Concrete Slabs for Sheds
-
- Preparing the Ground
-
- How to Pour a Slab Yourself
-
- Determining the Right Thickness
-
- Cost Considerations
Plus, we’ll end with how Concrete Taxi can help by providing the concrete you need!
The Importance of Concrete Slabs for Your Shed
Aside from providing a stable foundation for your shed, a concrete slab has several extra perks, making it a top pick for shed flooring. One of the biggest advantages is its unmatched durability. Concrete floors are known for their longevity, outlasting other materials and resisting wear and tear.
Once you’ve invested in a concrete slab, you can expect it to last for decades with minimal deterioration. Whether you’re using your shed for storage, a workshop, or even a small garage, a concrete floor can handle heavy foot traffic, the weight of equipment, and even the occasional chemical spill without any fuss.
Another great benefit of concrete floors is their low maintenance. Unlike wooden floors that need regular sealing, painting, or replacing damaged boards, or dirt floors that get muddy and uneven, concrete floors stay stable and functional with almost no upkeep. Once your slab is installed and cured, it needs nothing more than occasional cleaning.
This means less resealing, no worrying about rot or insects, and no periodic repairs. For busy shed owners, this low-maintenance feature is a huge plus, letting you focus on your projects or storage instead of floor upkeep. The mix of durability and low maintenance makes concrete floors a cost-effective choice in the long run, giving you the most bang for your buck despite the higher initial investment compared to cheaper flooring options.
Preparing the Ground for Your Concrete Slab
Proper ground preparation is crucial for a durable shed foundation. Before pouring the concrete slab, properly prepare the ground for a stable foundation. Clear the site of all vegetation, debris, and organic matter. Use wooden stakes and string to mark the slab’s perimeter for excavation.
Excavate to a depth that accommodates both slab thickness and base material. Typically, dig deep enough for a 7-15 cm compact base layer, increasing to 25-30 cm in colder climates or clay soil. Level the ground, filling any low spots with compacted dirt.
Lay a 50-100mm thick gravel base, and compact it with a plate compactor. Proper compaction prevents future settling and cracking. Ensure proper drainage, especially in clay soil, by adding a slightly thicker gravel layer if needed. Dampen dry base soil before compaction for best results. Proper preparation ensures a durable concrete slab base for your shed.
How to Pour a Concrete Slab for Your Shed
Pouring a concrete slab for your shed is a detailed process, but with the right preparation and tools, you can achieve a strong and durable foundation. Follow these steps to ensure your shed concrete slab is perfect:
-
- Gather Your Tools and Materials:
-
- Concrete mix
-
- Steel mesh or rebar for reinforcement
-
- Wooden form boards
-
- Stakes and string
-
- Plate compactor
-
- Shovel and rake
-
- Concrete float and trowel
-
- Water source and hose
-
- Wheelbarrow
-
- Level
-
- Gather Your Tools and Materials:
-
- Set Up the Formwork:
-
- Lay out the wooden form boards around the perimeter of the marked area, ensuring they are straight and level.
-
- Secure the form boards with stakes, making sure they are sturdy and can withstand the weight of the concrete.
-
- Set Up the Formwork:
-
- Reinforce the Slab:
-
- Lay steel mesh or rebar within the formwork to reinforce the concrete. This will help the slab withstand heavy loads and prevent cracks.
-
- Position the reinforcement so it sits in the middle of the slab’s depth, not touching the ground or the surface.
-
- Reinforce the Slab:
-
- Mix and Pour the Concrete:
-
- Mix the concrete according to the manufacturer’s instructions. You can do this in a wheelbarrow or with a concrete mixer.
-
- Pour the concrete into the formwork, starting at one end and working your way to the other. Spread the concrete evenly with a shovel or rake, ensuring it fills all corners and edges.
-
- Mix and Pour the Concrete:
-
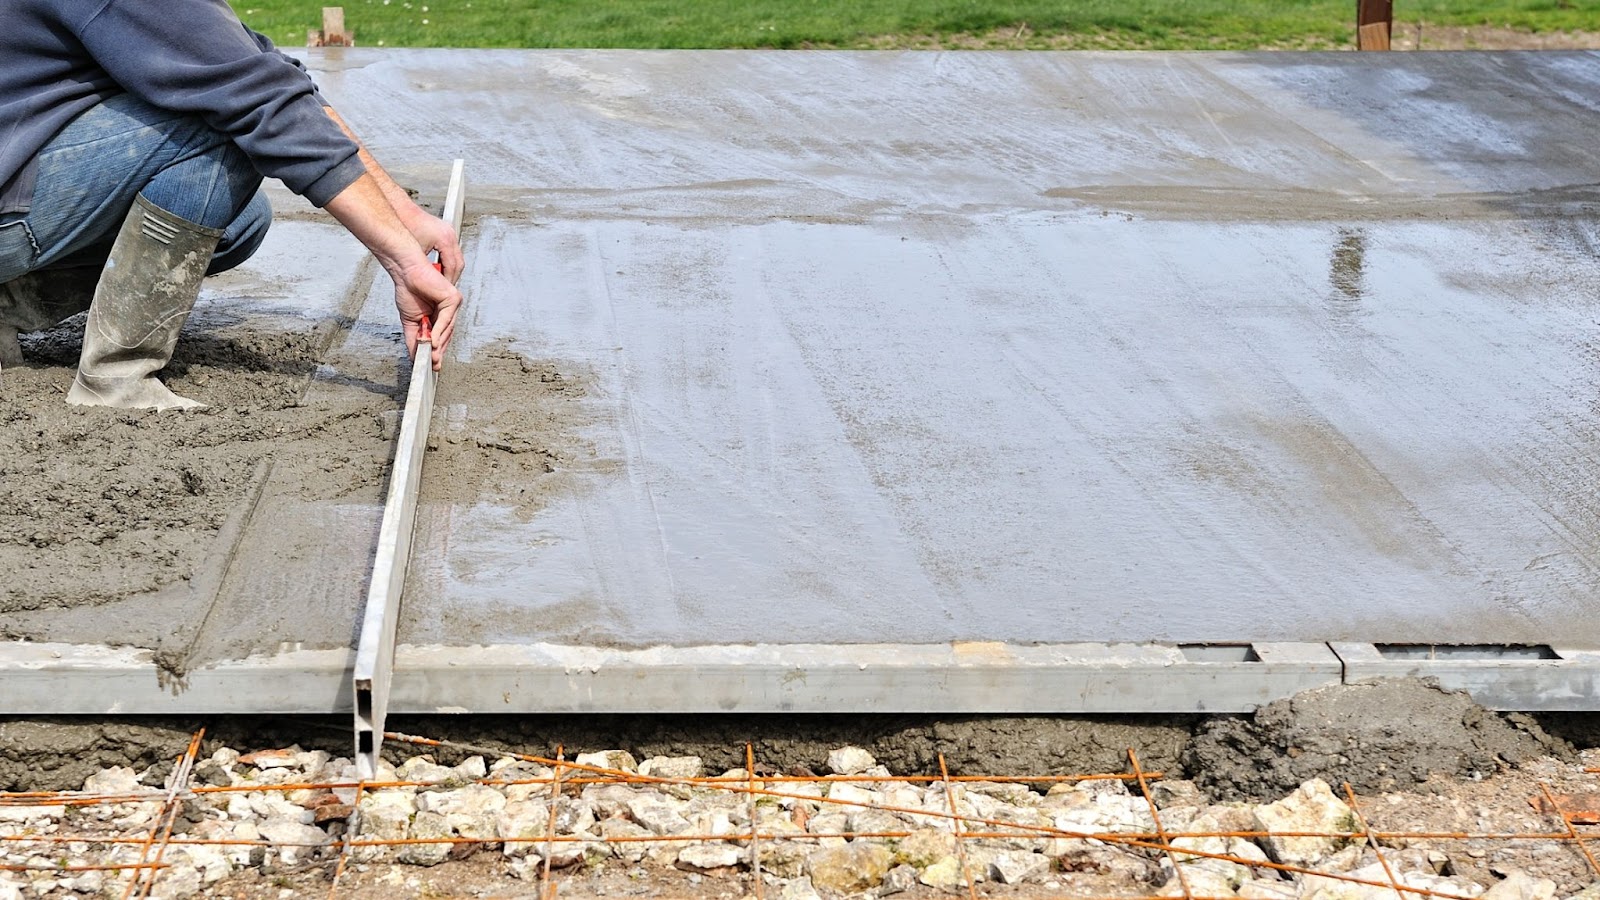
- Level and Float the Surface:
-
- Use a straightedge or a screed board to level the concrete surface. Move it back and forth in a sawing motion to remove excess concrete and fill in any low spots.
-
- After levelling, use a concrete float to smooth the surface. This helps to bring the cement paste to the surface and push down any aggregate, creating a more uniform finish.
-
- Level and Float the Surface:
-
- Trowel for a Smooth Finish:
-
- Once the concrete has set slightly, but is still workable, use a trowel to further smooth and finish the surface. This step ensures a solid base with a professional finish.
-
- For a non-slip surface, you can use a broom to create a light texture.
-
- Trowel for a Smooth Finish:
-
- Cure the Concrete:
-
- Curing is crucial to prevent shrinkage cracking and to achieve maximum strength. Keep the concrete moist by lightly spraying it with water and covering it with a plastic sheet or curing compound.
-
- Allow the concrete to cure for at least 7 days before placing any heavy machinery or building the shed walls.
-
- Cure the Concrete:
By following these steps, you’ll create a strong, durable concrete slab that serves as the perfect foundation for your shed. Whether it’s for storing heavy machinery, or a humble garden shed, a well-laid concrete floor will provide a lasting base.
Can I Pour a Concrete Slab Myself, or Should I Hire a Professional?
Deciding whether to pour a concrete slab for your shed yourself or hire a professional is crucial. Hiring a professional is often recommended for their expertise and proper equipment, ensuring a long-lasting foundation. Many shed builders may opt for a quicker, cheaper method that ultimately compromises the integrity of the shed by exposing its walls to corrosion.
DIY can be appealing if you have some construction experience and want to save on costs. However, pouring a concrete shed slab is complex and requires specific skills. Mistakes can lead to costly repairs.
Professionals handle challenges like soft soil, heavy loads, and meeting Australian standards. They ensure proper levelling, reinforcement, and curing to prevent issues like shrinkage cracks.
While professional installation may cost more upfront, the long-term benefits include a durable, stable base for your shed.
Ultimately, the decision between DIY and professional installation should be based on:
-
- Your level of experience
-
- Available time
-
- Budget considerations
-
- The importance you place on achieving the best possible foundation for your shed
How Thick Does a Concrete Slab Need to Be For a Shed?

Deciding on the concrete slab thickness for your shed is one of the most important choices you’ll make during the planning process. This decision isn’t one-size-fits-all; it depends on factors such as the shed’s purpose, the weight it needs to support, and local building codes. A minimum thickness of 100mm is generally recommended for most standard garden sheds in Australia, providing a solid foundation for typical shed contents and withstanding normal use.
For comparison, a garage slab typically requires a minimum thickness of 150mm to support the weight of vehicles and stored items.
Think about the long-term use of your shed before pouring the concrete. Are you planning to use your shed as a workshop for storing heavy machinery, parking cars, or using it as a home gym with heavy equipment? No matter the use case, these considerations will help you determine if you need to go thicker slab. The additional thickness, similar to a driveway slab, provides extra strength to handle the increased load.
installing heavy shelving units or using it as a home gym with heavy equipment, these considerations will help you determine if you need to go beyond the standard 100mm thickness.
Maintaining uniformity across the slab is crucial. Varying thickness can lead to uneven settling and potential cracking over time. For significant weight or frequent heavy traffic, consider incorporating reinforcement such as steel rebar or wire mesh. This additional support helps distribute weight evenly and increases the slab’s overall durability and resistance to cracking.
While a thicker slab might seem like overkill for a simple garden shed, it’s always better to err on the side of caution. A slightly thicker slab now could save you from costly repairs or replacements in the future. Consult with a professional concreter to ensure the best outcome for your project.
Bonus Tip: Waterproofing Your Shed’s Concrete Slab
Applying waterproofing to your shed’s concrete slab is vital for ensuring the foundation’s durability. One effective method is using a rebated concrete slab, which creates a slight lip around the perimeter to prevent water ingress. This design is particularly recommended for garden sheds to keep belongings dry during wet weather.
Additionally, applying a waterproof membrane between the shed and the concrete slab adds extra protection against moisture. This barrier prevents water from seeping through the concrete and reaching the shed’s floor or walls, safeguarding against potential water damage, rot, mould, and structural weakening.
For comprehensive waterproofing, don’t overlook sealing. After your shed is in place, follow these steps to ensure a watertight seal:
-
- Clean the surface around the inside base of the shed.
-
- Apply a high-quality silicone sealant around the inside base of the structure.
-
- Ensure the sealant is evenly spread to create a watertight seal between the shed and the concrete slab, further enhancing its water resistance.
The combination of a rebated slab, waterproof membrane, and proper sealing ensures that your shed stays dry and protected, even in heavy rain. While concrete floors are naturally water-resistant, these measures provide additional assurance against moisture-related problems, maintaining the integrity of your shed floors and contents for years to come.
How Much Does it Cost to Build a Concrete Slab For a Shed?

Knowing the cost is crucial for the budget-savvy builder in the planning phase of your shed project. The price of constructing a concrete slab can vary significantly based on factors like strength, volume, and decorative features.
Typically, costs range between $50 to $150 per square metre throughout Australia, providing a good starting point for estimating your project costs.
Several key factors can affect the cost of your concrete slab, including:
-
- Shed Dimensions: Naturally, a larger slab requires more materials and labour, increasing the overall cost.
-
- Slab Thickness: Thicker slabs for heavy-duty purposes will be more expensive than standard thickness slabs for typical garden sheds.
-
- Site Accessibility: Difficult-to-reach project sites or those requiring special equipment may add to the final price.
For an accurate estimate, start by measuring the required area and deciding on the desired thickness based on your shed’s intended use.
Concrete Taxi offers a user-friendly quote calculator that provides quick estimates tailored to your project specifications. This tool is invaluable for initial planning purposes. For the most accurate quote, consult directly with our concrete professionals, who can assess your specific site conditions and requirements. They will provide a detailed quote, ensuring you understand all the costs involved in creating the perfect foundation for your shed.
Ready to get started? Use our calculator or give us a call today to ensure your shed project is on solid ground with Concrete Taxi’s expert services!
Sealing the Deal
Building a concrete slab for your shed is a crucial investment in its longevity and functionality. We’ve covered the essential role a concrete slab plays in providing stability and durability, along with the techniques for proper ground preparation and pouring.
Choosing the right thickness, implementing effective waterproofing, and deciding between DIY and professional installation are all vital steps. Concrete floors offer low maintenance and exceptional durability, making them an ideal choice for shed foundations.
While upfront costs matter, the long-term benefits of a well-constructed concrete slab outweigh the initial investment. A strong foundation is key to a sturdy, long-lasting shed. At Concrete Taxi, we’re always here to help. This guide should give you the confidence to create a concrete slab that will serve as the perfect base for your shed for years to come. If you need a hand or some top-quality concrete, don’t hesitate to get in touch. Let’s get that shed solid and secure!


